Business2Go Blog - Messages with tag "Advanced Filter"

What makes advanced filter a really powerful and useful tool?

We have already mentioned that we've developed a data filtering mechanism that allows building complex filtering conditions, using logic operators AND, OR and perform geo filtering. However, there is another thing that rockets filtering possibilities to a higher level. Namely, advanced filter access to linked data. For example, in Accounts module (as well as any other module that supports advanced filter) you can now build filters with the use of not only the module's main list fields, but also those of other data lists in this module (addresses, contacts, activities, files etc), and even fields from the data lists of other modules that are linked with Accounts.

Before, in order to build a complex query involving fields from different data lists you'd have to use reporting system. Which would take a lot of time and effort requiring SQL skills and other special skills. Another inconvenience is that the final report would be separated from the place where its data would be needed. We're talking about such cases when mailing is to be done by selected data or when this data needs to be corrected. Therefore, building a report via reporting system only gives you some extra hard time as you transfer the data from report to module where it should be applied.

Let's assume we need to find in Accounts module all companies with unvalidated address. Since a company may have several addresses, we should build our query with the use of Account Addresses which is an additional data list (Accounts, the main data list contains only primary addresses). In order to use Account Addresses we have to connect it: select Add/Remove Related Entities… command in advanced filter.


This opens the following window:


In the Selected field, you can tick the data lists you need to connect. We need Account Addresses so let's tick the corresponding box.


And click OK. Now, when Account Addresses fields are added to advanced filter, we can build a query and find all the companies that have unvalidated addresses. In order to define whether an address is validated, advanced filter checks the Validated field from Account Addresses list.


Let's now build a query which will check whether this field has negative value for every address.


And execute it by clicking the Apply button. Finally we will get the following selection:


It is crucial that our selection is located in the same place where we can validate addresses and flag the Validated field. Let's open a list of addresses for one of the companies.


As we can see, none of the addresses is validated. A person responsible for address validation should check them and tick the Validated field for all the valid addresses.

In the same way you can build queries to any other linked data and get your selection exactly where you want to process it.

Geo Filtering Step by Step

We have mentioned before that Business2Go v3 will have a very powerful search and filtering tool – Advanced Filter. It will be available in such modules as Customers, Vendors, Invoices etc. It allows instant ad-hoc selection retrieval and will save you a lot of time and effort in case you want to get a specific one-time selection without creating a report in reporting system. We have also mentioned that Advanced Filter supports geo filtering. Let us have a closer look at what it is, how it works and how you can use it.

Geo filtering is available for data sets that contain postal addresses in such modules as Accounts, Customers, Vendors, Manufacturers and so on. An address itself cannot be used for geo filtering – it is necessary to calculate its geographic values (latitude and longitude) which can be easily done with Find and Update Geographic Point Coordinates command.


This will update Latitude and Longitude fields for the selected address and fill them with calculated values. Internet connection is necessary for this operation.


Multiple addresses can be processed instantly by clicking them with CTRL key depressed (Multi Select mode must be activated) and applying the same command (Find and Update Geographic Point Coordinates).

In order to check the addresses with blank latitude/longitude values for all the companies you can make the following inquiry in Advanced Filter:


Then select all the companies with Multi Select Mode on and apply Find and Update Geographic Point Coordinates.


You should keep in mind that this option only works for company’s primary address. In case a company has any additional addresses, make an Advanced Filter inquiry using Addresses related entity. It will show you all the companies that have several addresses, some of which may not have geo coordinates calculated. You can update additional address geo coordinates only by entering company details and applying Find and Update Geographic Point Coordinates individually for each address. Doing this for every company profile can be quite time-consuming, therefore we recommend to calculate the coordinates right after you add a company address.

Once company address coordinates are calculated, let’s search for these companies and use some geo filtering operators. An important note is that address geographic values are represented in Advanced Filter by Geographic Point (Lat/Lng) field and this very field is used to make inquiries while Latitude and Longitude fields are used to enter coordinates and geo filtering operations are not available for them.

Let’s assume we need to find all the companies located in Lower Manhattan as far as Central Park. First step would be to select Geographic Point (Lat/Lng) field in Advanced Filter and launch inside polygon data selection.


Then click the "…" button to select an area on the map.


It will open a window:


Where we draw a polygon around the target area:


Next click OK and the polygon vortex coordinates will be sent to filter.


In the filter window click Apply and the results will be showed:


The picture above shows a list of companies located inside our polygon. We can see company locations on the map if we select them and choose Tools > Find Location on Map from ribbon menu.


All these actions take less than 5 minutes. Completing a task like this with any manual method would be extremely difficult and require a lot of effort. Now it’s just another ordinary operation.
We have showed you how to use the most helpful filtering operator – inside polygon. There are other operators you can use for geo filtering:

  • Equals – equal to a certain geo point, is set in latitude longitude format (i.e. 40.698861 -74.018326) or address;
  • Does not equal – not equal to a certain geo point or address;
  • Is blank – a blank geo point with no coordinates;
  • Is not blank – geo point contains coordinates
  • In – uses a geo point sequence in latitude – longitude format and the company address coordinates must match at least one of the points in the sequence
  • Not in – company address coordinates must not match any of the points in the sequence (geo point format is latitude – longitude)
  • Inside polygon – company address coordinates must be located inside of a polygon, vortexes of which are set as points on the map;
  • Not inside polygon – company address coordinates must be located outside the polygon;
  • Within a radius of – company address coordinates must be located within a certain radius from a point on the map (radius is set in meters)
  • Not within a radius of – company address coordinates must be located outside the area defined as a radius from certain point on the map.
Let’s look at another helpful geo filtering operator – within a radius of. It allows searching for coordinates within a certain radius around a point on the map. The point can be set by coordinates or an address. Radius is set in meters. Let’s assume we’d like to find all the companies within a radius of 2,000 m from 136 MulberryStreet, NewYork, NY 10013, USA.


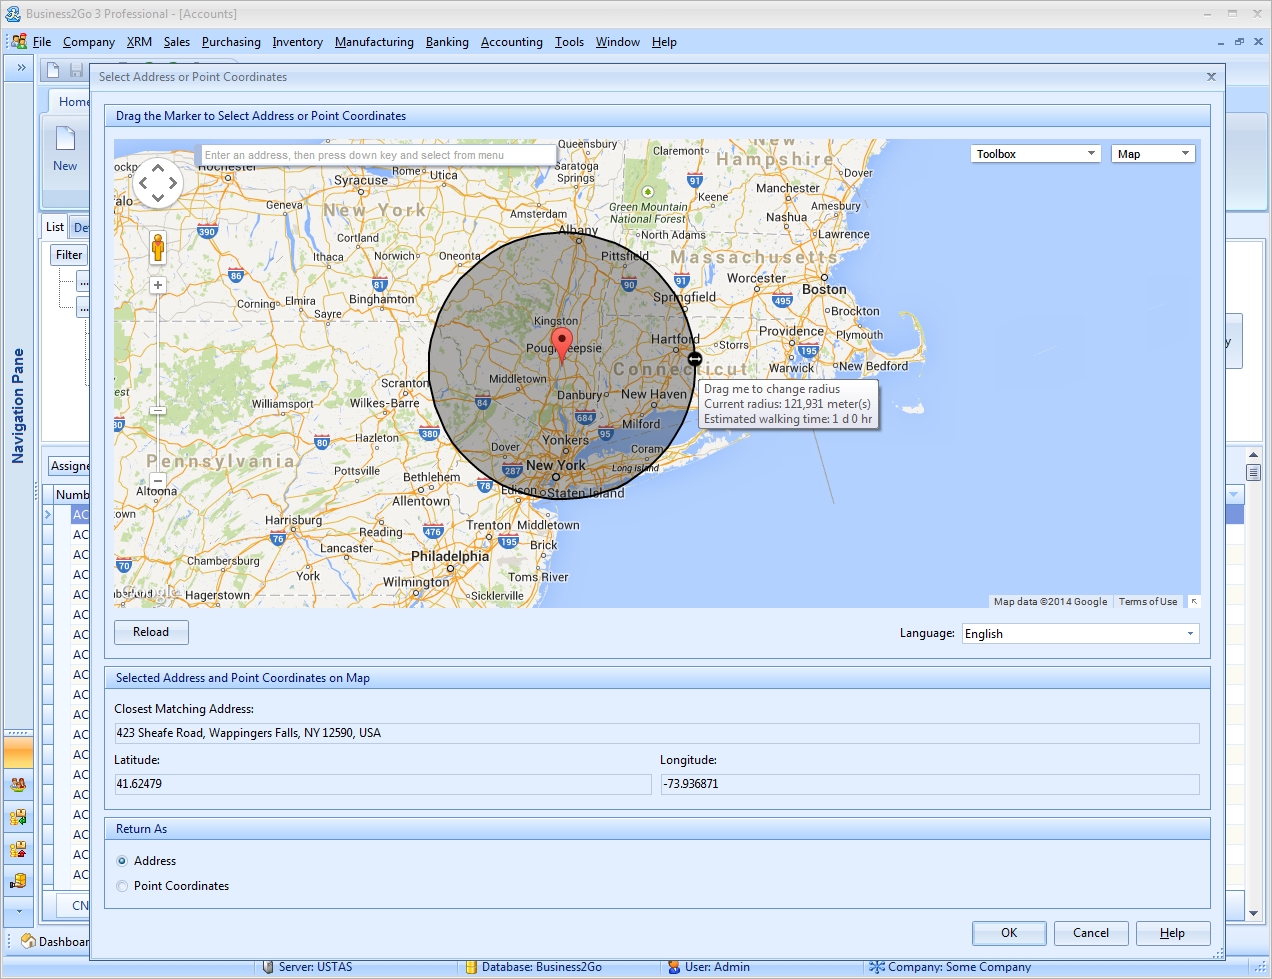
In order to see how it looks on the map or select another address, click the "…" button and the following window will open:


You can move the marker to any place or change the radius. Hovering cursor over the edge of circle (where the arrows are located) you can check the radius length in meters and approximate time required to cover this distance on foot via shortest possible route.

Now let’s click OK in this window, then Apply in the filter window and see what companies match our area.


We can also check their location on the map.


Now you have a simple, direct and very fast way of geo filtering your data. You can use it in marketing to estimate your current and potential customers. Or in advertising to estimate how attractive your advertising banners would look at certain locations or how worthwhile would be to open stores at those locations etc.

Filtering Data Lists: a Convenient Favorites Feature

Even before the new version is released we get a lot of opinions on improving Business2Go. One of those that we have already put into practice concerns data filters. In the New Features of List Data Filtering article we wrote about new features we were going to introduce in filters, such as an option to create complex filtering expressions and save them in data storage. Since in many cases complex expressions in data filtering and information search are reasonable alternative to reporting system, it was met by our users with high appraisal, and so was a useful option of storing these expressions for further use.
There can be dozens of stored expressions like these and even hundreds if you’ve been using the product for a while. So at times, it can be a bit challenging to find a particular filter. However, even with a large amount of stored expressions there will only be a few that you use the most and would want to access as quick as possible. And this is where our new Favorites feature will be extremely helpful. It’s pretty similar to that of web browsers. Let’s have a close look at it.

Generally, Favorites is based on an internal mechanism of filtering expression save and load with just a little enhancement. Let’s create a filter in the Cities module and save it.


When you save a filtering expression, tick the Favorites checkbox.


Now let’s see how the saved filter is presented in the filter storage.


The picture shows that now there is the Favorite column in the filter list. If this column is marked with a tick, according filter is added to Favorites.


Now let’s learn how we can easily access our favorite filter. Go back to the Cities module and right-click Advanced Filter area. Hover over Favorites in the dropdown menu to see the Favorite filters list.


Simply select this filter to load its conditions.


In case you need to add previously saved filters to Favorites or remove filters from the list, go to stored filters form and in the dropdown menu click Make as Favorite to add or Remove from Favorites to remove.


As you see, this feature can be very useful and practical for those who do filtering a lot and create multiple data requests while using certain filtering expressions more often.

New Features of List Data Filtering

Business2Go v3 provides a completely re-worked filtering and search mechanism for such lists as Cities, Customers, Vendors, Invoices and others. Our experience has shown that in some cases the user needs an ultimately simple time-saving filtering mechanism, other cases require advanced search options. To meet these needs, Business2Go provides two types of filters:

  • Quick Filter - this filter is best used for simple lists or lists with a natural key. For example, the city list has the Name field that contains the city name by which the search of the required city is performed to fill in the address fields in the customer and vendor cards. This filter is ultimately simple and is aimed at the quick search of the required information;
  • Advanced Filter - this filter is applied in cases of complex search condition, or when the information does not have an easy to remember natural key. For example, lists of invoices, purchase orders etc. The filtering criteria in such lists are usually quite diverse. For example, you might need to see all invoices created by a specific user for a specific period, or all unpaid invoices for a specific customer in the past year. This filter type allows creating any filtering criterion, which, on the other hand, takes time and adds complexity compared to Quick Filter.

It is up to you to decide when to opt for Quick Filter or Advanced Filter, depending on your needs. It takes a couple of clicks to switch between the two of them.

Let us have a closer look at each other the two filters.

QUICK FILTER

We will take the city list as example. Business2Go v3 Professional provides a ready-to-use list of the cities for the USA, Canada, Australia and New Zealand. Creating your company's database, you may choose countries whose cities you would like to add to your database. Assume that you work with all these countries and uploaded all the cities in the database. That is a considerable list with over 30,000 entries. Now you need to create a customer card and fill in the customer's address. Scrolling down the list of 30,000 entries to find the required is inconvenient, isn't it? To facilitate selection from the drop-down list, you can use the incremental search without filtering, as shown in the picture below.


Alternatively, you may use Quick Filter. To do so, you need to enable it first. In the toolbar, expand the Filter Kind popup menu and select Quick.


This will bring up the filter pane next to the drop-down city list.


This pane contains three controls:

  • Filter by where you enter the text by which the list is supposed to be filtered;
  • In where you select the field by which filtering is performed. Any field can be selected that is available in the basic city list. You may also select (Any Field) to filter by all fields simultaneously;
  • and Operator to specify the command that will be used to filter the list data.


A wide selection of operators is available for you to filter the list data.


The most frequent are Begins with (filter by the first letters) and Contains (by the text contained in the name). Contains all of and Contains any of are also among the frequently used. The former is useful when you need to search long names that you partly remember. The sequence of the entered words is not important for this operator, but the name must contain all words or parts of words that you enter.


This filtering type is best used in inventory item lists, which are often quite long and contain long names that you cannot keep in mind. This filter can make finding the required item faster and easier. The latter, Contains any of, is useful when you do not remember the exact name. You only enter various combinations of the words you remember, and the system shows you all the filtered items that contain at least one of the entered words.


The disadvantage of these filtering operators is that they are not fast enough. The fastest operators are Equals and Begins with that work instantaneously even in the lists of dozens of thousands items.

Another couple of things to mention about Quick Filter are:

1) Filter as You Type mode in the Filter by field. To enable it, the Filter as You Type button () in the toolbar must be shown as active. In drop-down lists, it looks like this:


In conventional lists it looks like this:


We recommend that you disable the Filter as You Type mode when working with extremely large lists or in case your Internet connection is slow, as every time you type a character in the Filter by field, a filtering expression is sent to the database, which can overload the database. With small amounts of data (up to a hundred thousand records) neither you nor your colleagues working with the data may not even notice that slow down, but with large amounts of data, usage of Filter as You Type can have an extremely negative impact on the system speed. That is why it is highly recommended that you disable this mode when working with long lists. The Apply button will appear on the filter pane after you disable the mode. To apply the filter specified in the Filter by field, press Enter or click Apply.


2) Making a specific filter condition a default filter. Every time you open the corresponding list or drop-down list, the default filter will be applied by filling in the Filter by, In, Operator fields. For example, assume that the Filter by field is empty, (Any Fields) is selected in the In field and Contains is selected as operator. To save these selections, right-click the filter pane. The context appears:


Select Save as Default. Now every time you open this drop-down list, the Filter by, In and Operator will contain the selected values.

ADVANCED FILTER

This filter is best to use when there is no obvious or easy-to-remember natural key, or when you need to search with complex search conditions.

To enable Advanced Filter, open the Filter Kind menu and select Advanced.


This will switch the mode from Quick Filter to Advanced Filter.


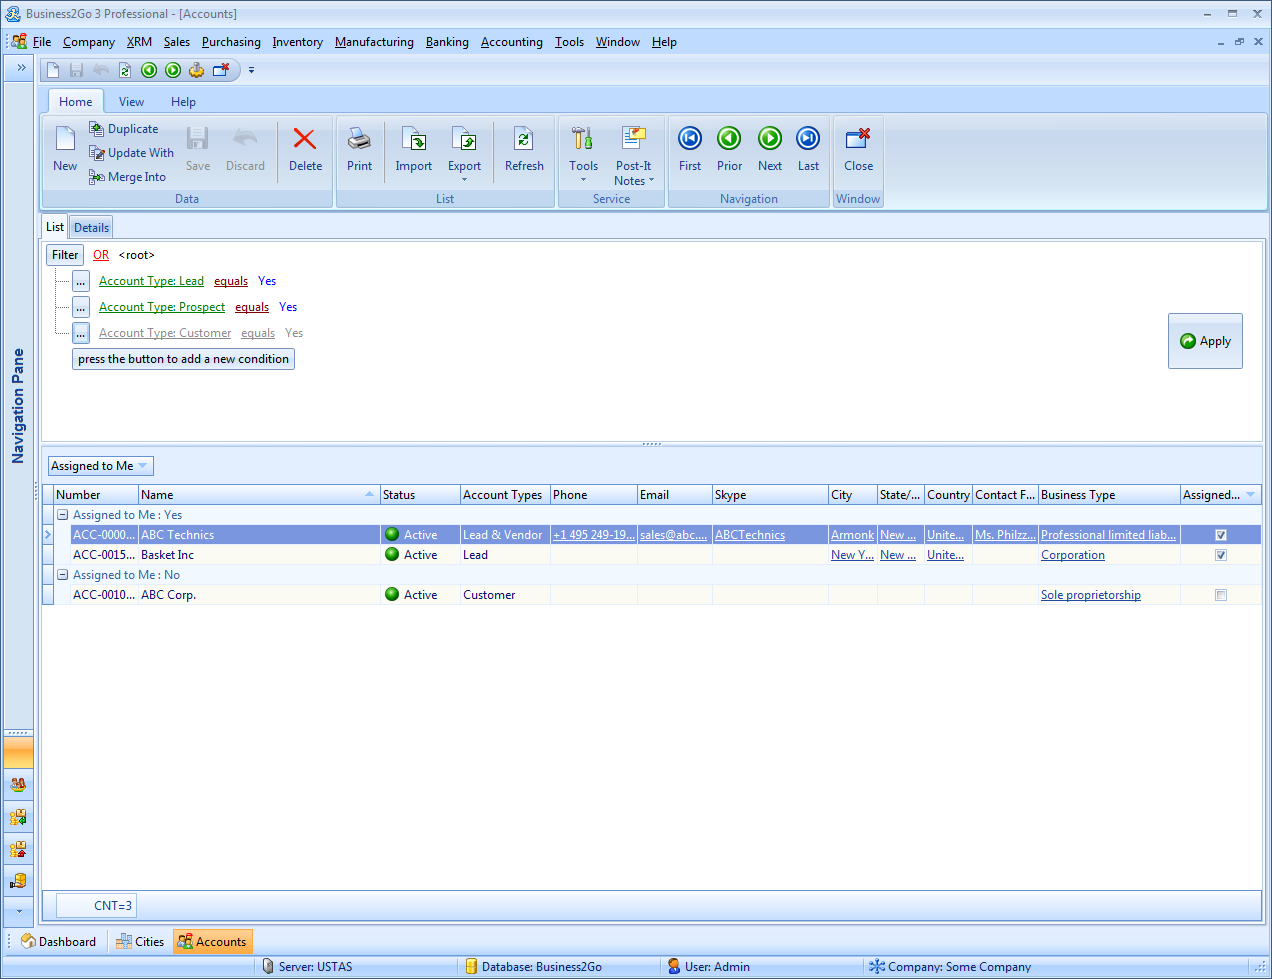
Now try to create a filter expression that will bring up all our Leads, Prospects and Customers. As companies we are searching must have either of the three account types: Lead/Prospect/Customer which means that we need to set the logical OR for the condition group.


Click press the button to add a new condition and add three conditions.


Click Apply to apply the filter.


Similarly, you can create selection of almost any complexity using complex conditions and even more. Advanced Filter allows geographical filtering to select data from a specific region on the map, for example, a state, city district, street, quarter etc. To apply this filtering type, you must geocode all the addresses first.


Now, let us make the conditions even more complex and try to find leads, prospects and customers in a specific part of the state of New York. To do so, we need to change the filtering condition by adding a new condition with the field Geographic Point (Lat/Lng) and select inside polygon as operator.


To select the region on the map, click the ellipsis button.


This brings up the map where we draw a polygon to search in.


In the selection dialog, click OK, and the polygon vertices from the Polygon Points (Lat/Lng) will be added as filter conditions.


Click Apply to apply the filter. The selection shows up.


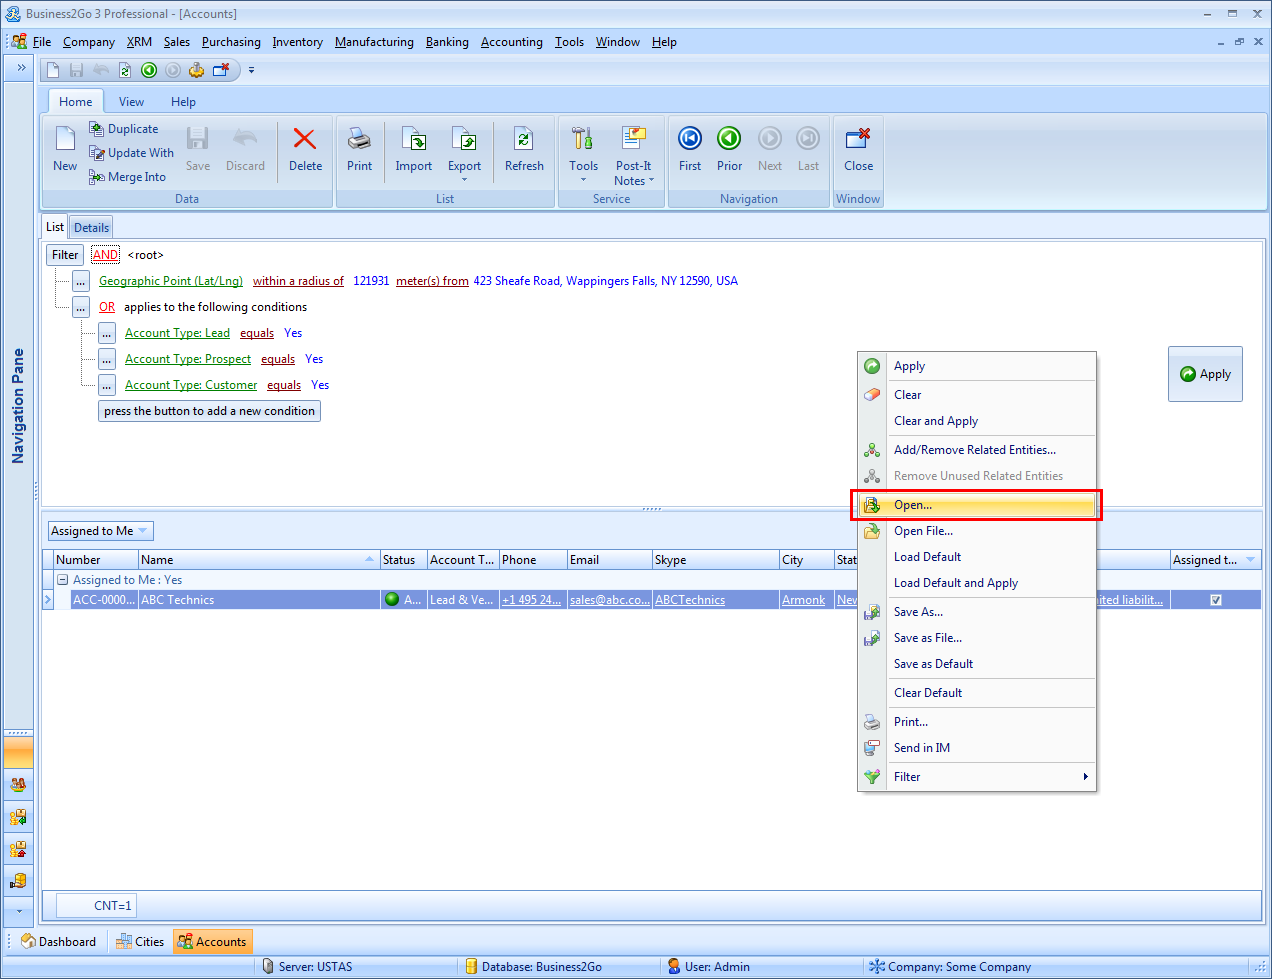
With the geo-filtering operator within a radius of, you can search within a certain area around a specific point. The point can be set as address or coordinates of latitude and longitude.



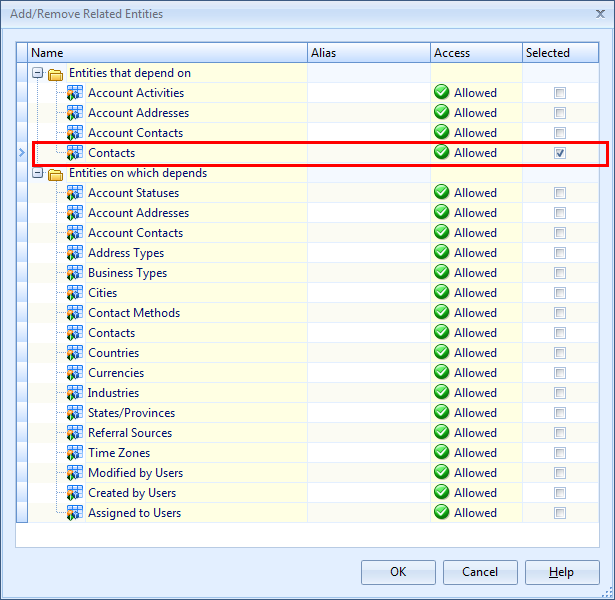
Another feature of Advanced Filter is the ability to refer to related data fields. It means that in the Accounts module filter you can refer to Invoices or any other module fields, if its data are related to Accounts. For example, we need to select companies that have at least one contact person older than 35. To access contact data we need to add these data...


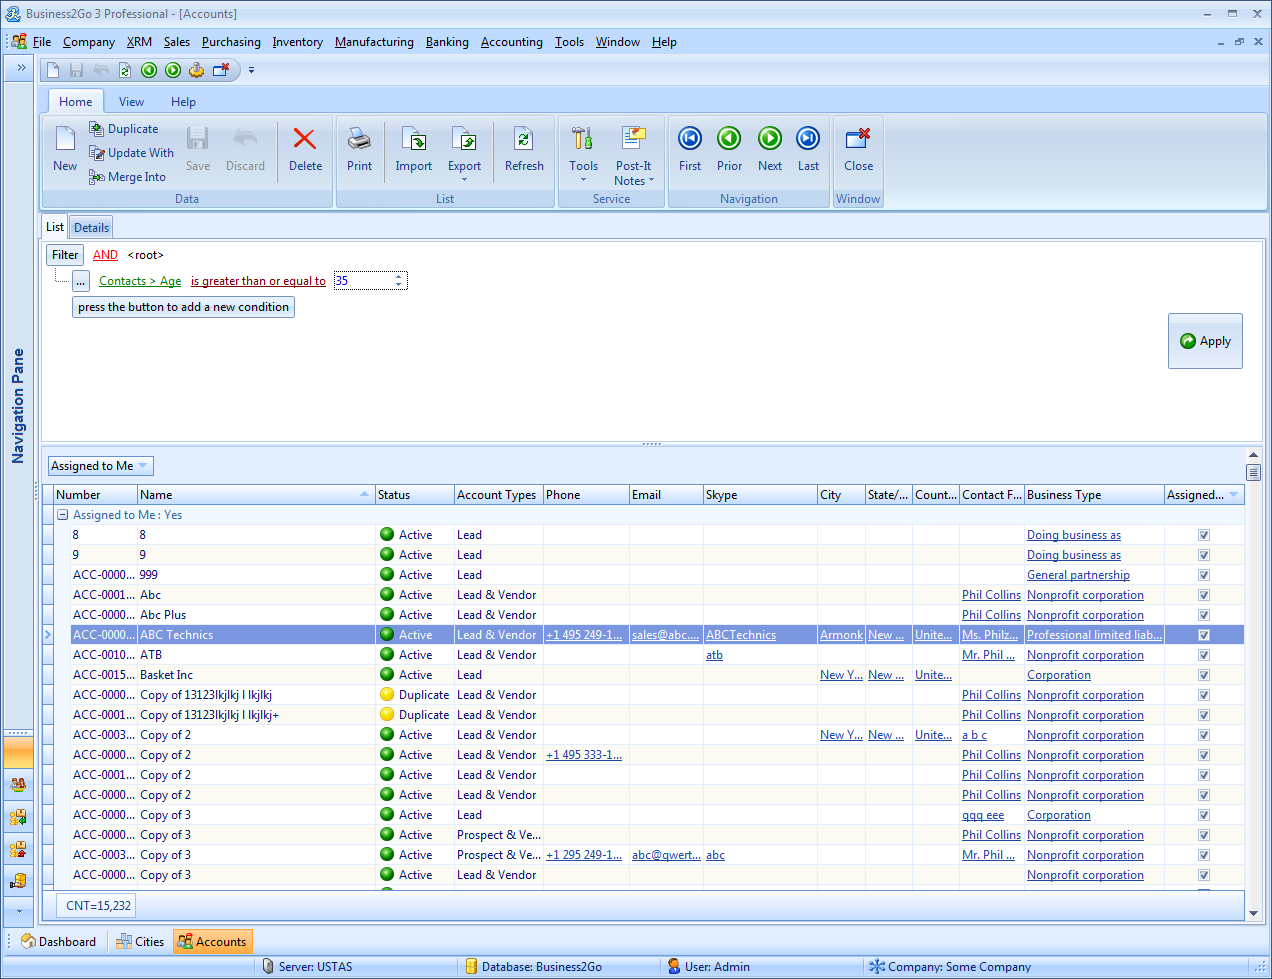


...and create a filter condition. Click Apply.
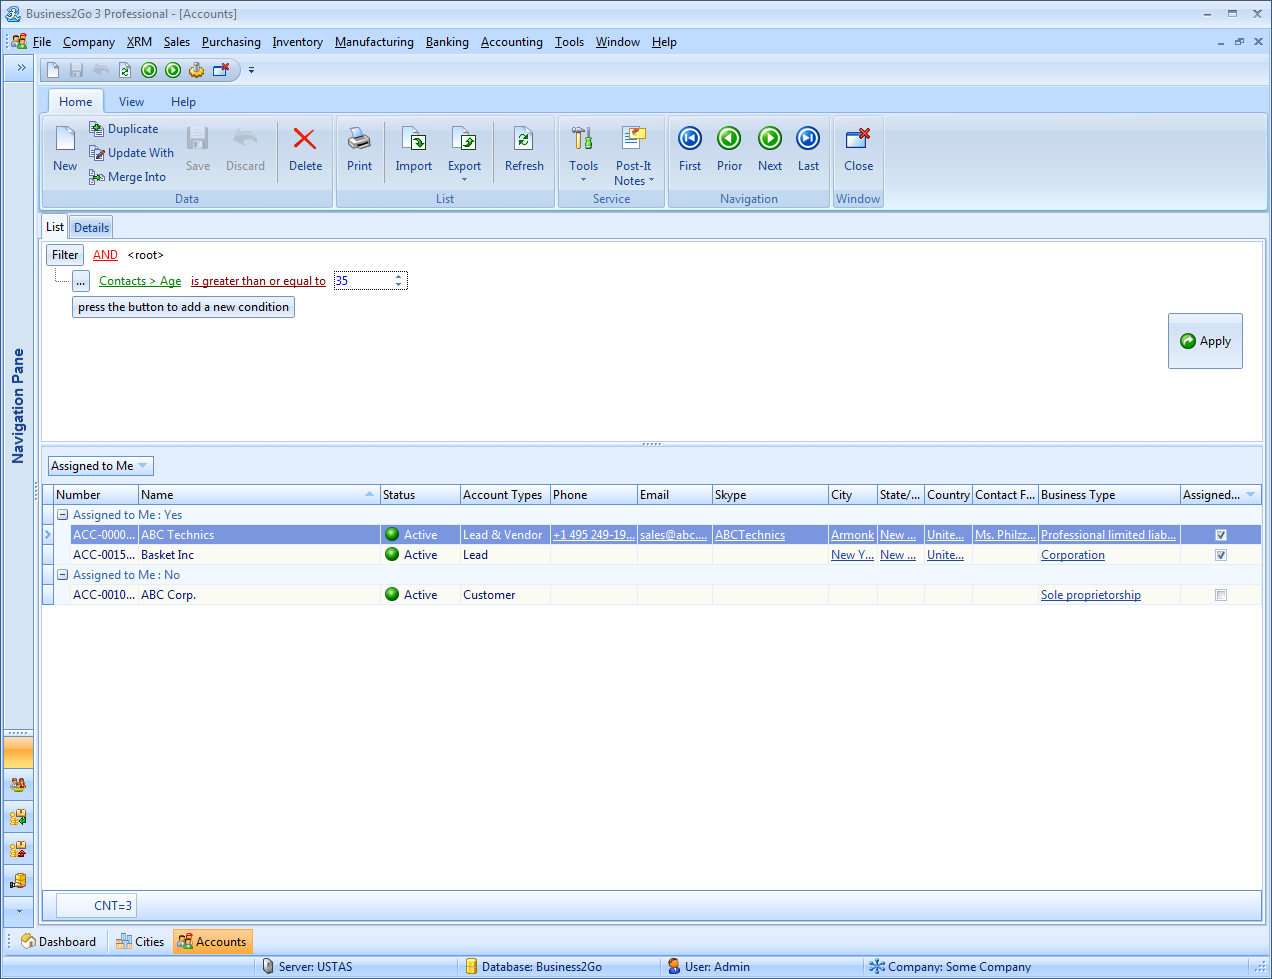


Other useful features of Advanced Filter include:

1) Ability to disable some filter conditions


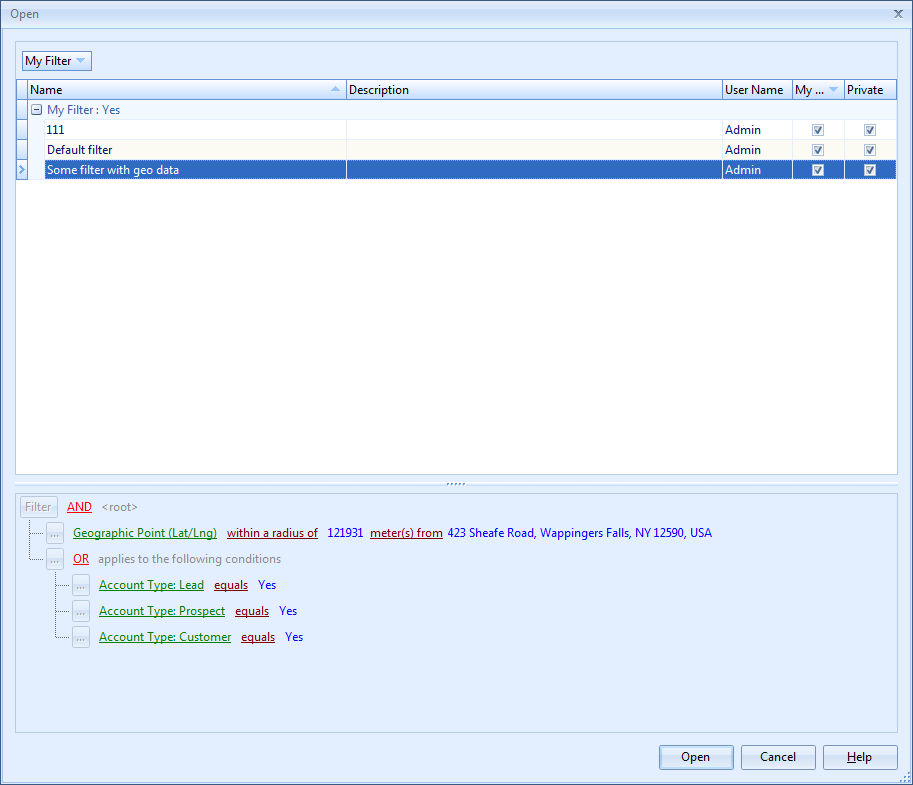
2) Ability to save filter expressions to reuse and share with other users


3) Additionally, if you use a specific filter expression frequently, you do not have to create it every time you open the module or the drop-down list. You can simply create the expression once and save it as a default filter that will be applied automatically, when you open the respective data list


With all the features mentioned above, Advanced Filter is an amazingly powerful tool to perform a wide variety of tasks, that can be used both for its direct purposes to filter data in modules and drop-down lists, and to generate ad-hoc queries - a reporting system of sorts.