- Quick Filter - this filter is best used for simple lists or lists with a natural key. For example, the city list has the Name field that contains the city name by which the search of the required city is performed to fill in the address fields in the customer and vendor cards. This filter is ultimately simple and is aimed at the quick search of the required information;
- Advanced Filter - this filter is applied in cases of complex search condition, or when the information does not have an easy to remember natural key. For example, lists of invoices, purchase orders etc. The filtering criteria in such lists are usually quite diverse. For example, you might need to see all invoices created by a specific user for a specific period, or all unpaid invoices for a specific customer in the past year. This filter type allows creating any filtering criterion, which, on the other hand, takes time and adds complexity compared to Quick Filter.
It is up to you to decide when to opt for Quick Filter or Advanced Filter, depending on your needs. It takes a couple of clicks to switch between the two of them.
Let us have a closer look at each other the two filters.
QUICK FILTER
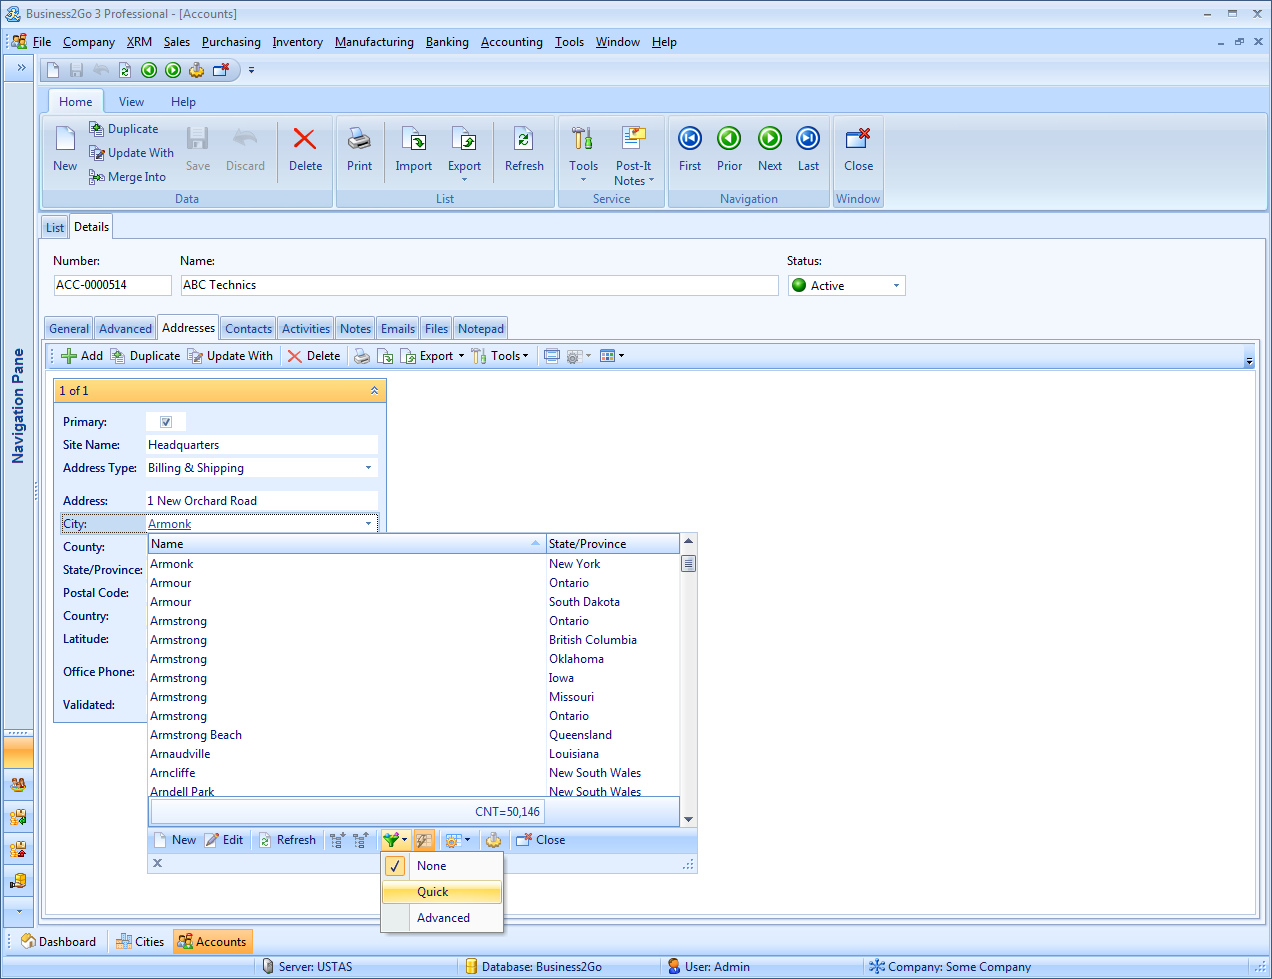
We will take the city list as example. Business2Go v3 Professional provides a ready-to-use list of the cities for the USA, Canada, Australia and New Zealand. Creating your company's database, you may choose countries whose cities you would like to add to your database. Assume that you work with all these countries and uploaded all the cities in the database. That is a considerable list with over 30,000 entries. Now you need to create a customer card and fill in the customer's address. Scrolling down the list of 30,000 entries to find the required is inconvenient, isn't it? To facilitate selection from the drop-down list, you can use the incremental search without filtering, as shown in the picture below.

Alternatively, you may use Quick Filter. To do so, you need to enable it first. In the toolbar, expand the Filter Kind popup menu and select Quick.
This will bring up the filter pane next to the drop-down city list.
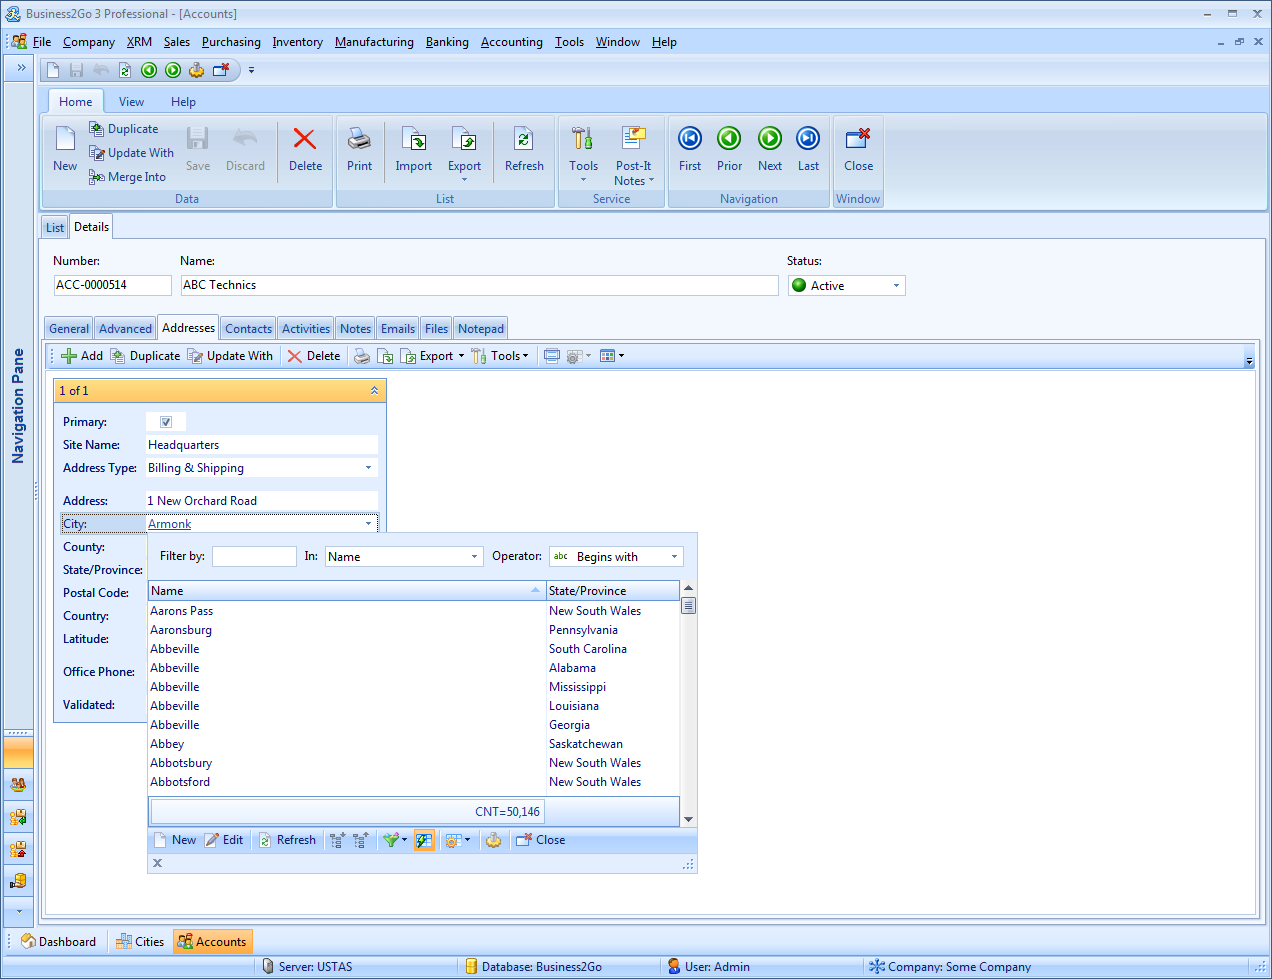
This pane contains three controls:
- Filter by where you enter the text by which the list is supposed to be filtered;
- In where you select the field by which filtering is performed. Any field can be selected that is available in the basic city list. You may also select (Any Field) to filter by all fields simultaneously;
- and Operator to specify the command that will be used to filter the list data.

A wide selection of operators is available for you to filter the list data.
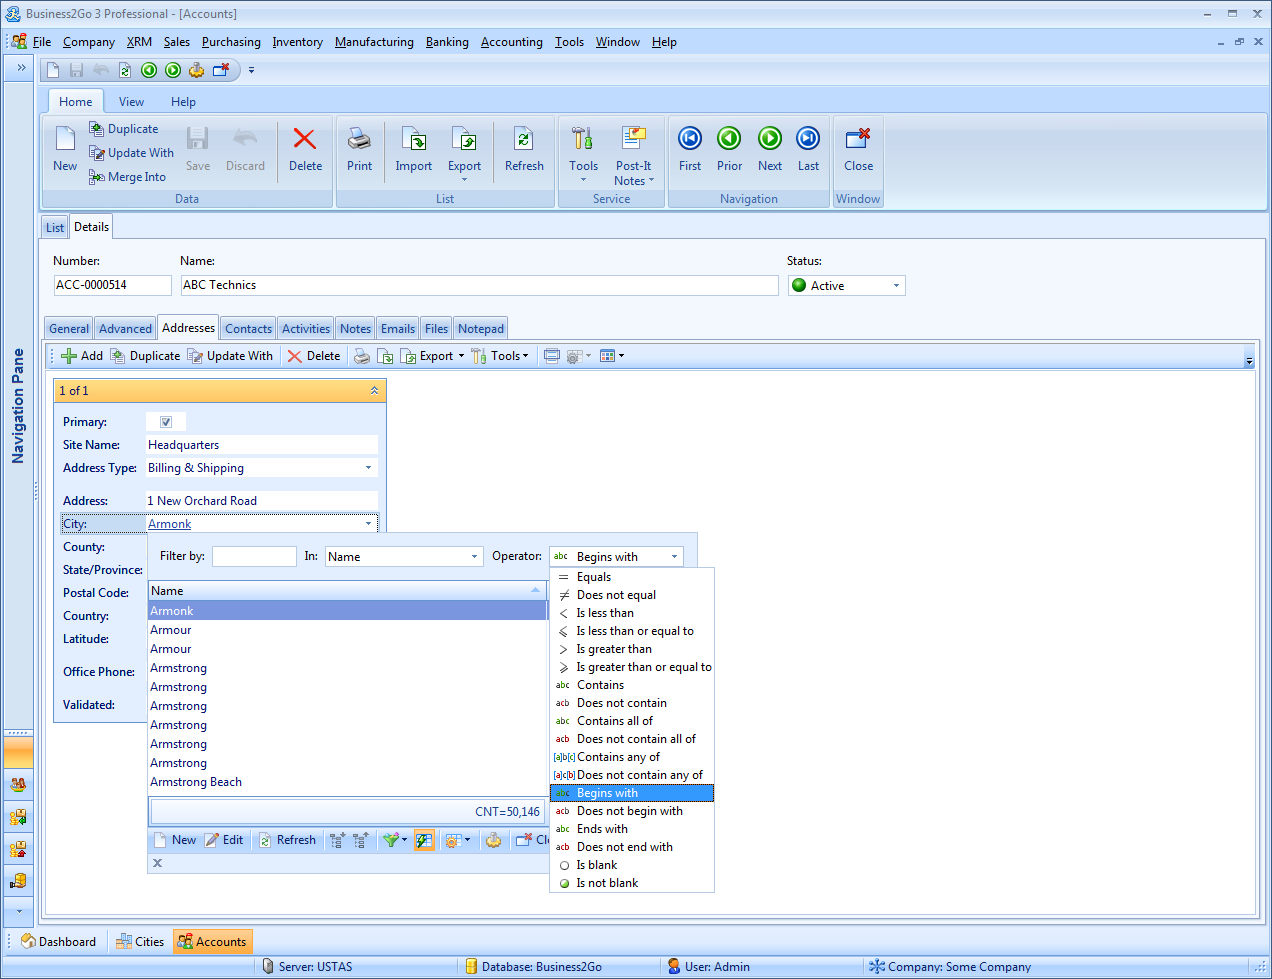
The most frequent are Begins with (filter by the first letters) and Contains (by the text contained in the name). Contains all of and Contains any of are also among the frequently used. The former is useful when you need to search long names that you partly remember. The sequence of the entered words is not important for this operator, but the name must contain all words or parts of words that you enter.

This filtering type is best used in inventory item lists, which are often quite long and contain long names that you cannot keep in mind. This filter can make finding the required item faster and easier. The latter, Contains any of, is useful when you do not remember the exact name. You only enter various combinations of the words you remember, and the system shows you all the filtered items that contain at least one of the entered words.

The disadvantage of these filtering operators is that they are not fast enough. The fastest operators are Equals and Begins with that work instantaneously even in the lists of dozens of thousands items.
Another couple of things to mention about Quick Filter are:
1) Filter as You Type mode in the Filter by field. To enable it, the Filter as You Type button (
 ) in the toolbar must be shown as active. In drop-down lists, it looks like this:

In conventional lists it looks like this:

We recommend that you disable the Filter as You Type mode when working with extremely large lists or in case your Internet connection is slow, as every time you type a character in the Filter by field, a filtering expression is sent to the database, which can overload the database. With small amounts of data (up to a hundred thousand records) neither you nor your colleagues working with the data may not even notice that slow down, but with large amounts of data, usage of Filter as You Type can have an extremely negative impact on the system speed. That is why it is highly recommended that you disable this mode when working with long lists. The Apply button will appear on the filter pane after you disable the mode. To apply the filter specified in the Filter by field, press Enter or click Apply.

2) Making a specific filter condition a default filter. Every time you open the corresponding list or drop-down list, the default filter will be applied by filling in the Filter by, In, Operator fields. For example, assume that the Filter by field is empty, (Any Fields) is selected in the In field and Contains is selected as operator. To save these selections, right-click the filter pane. The context appears:

Select Save as Default. Now every time you open this drop-down list, the Filter by, In and Operator will contain the selected values.
ADVANCED FILTER
This filter is best to use when there is no obvious or easy-to-remember natural key, or when you need to search with complex search conditions.
To enable Advanced Filter, open the Filter Kind menu and select Advanced.
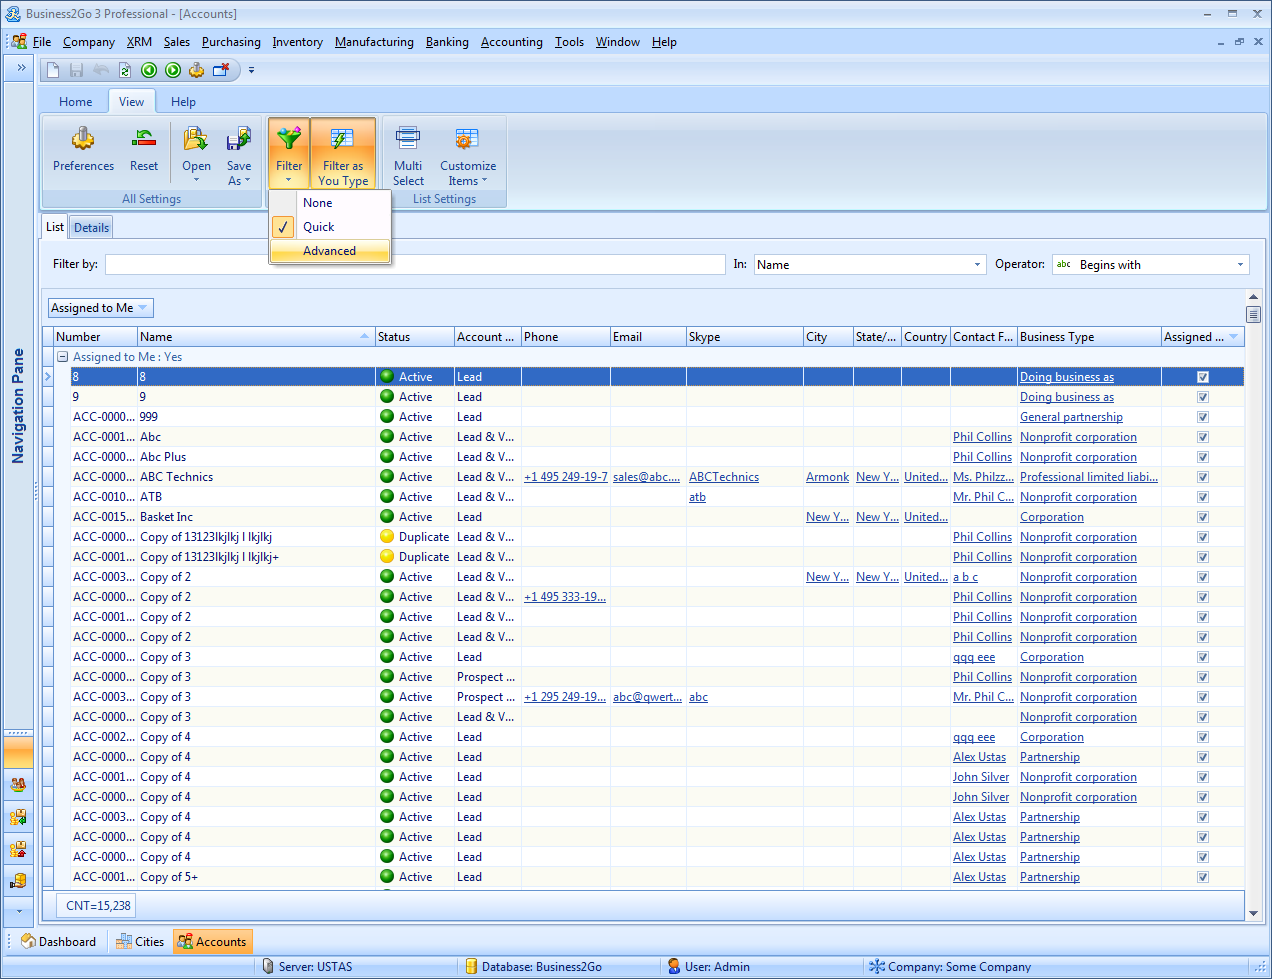
This will switch the mode from Quick Filter to Advanced Filter.

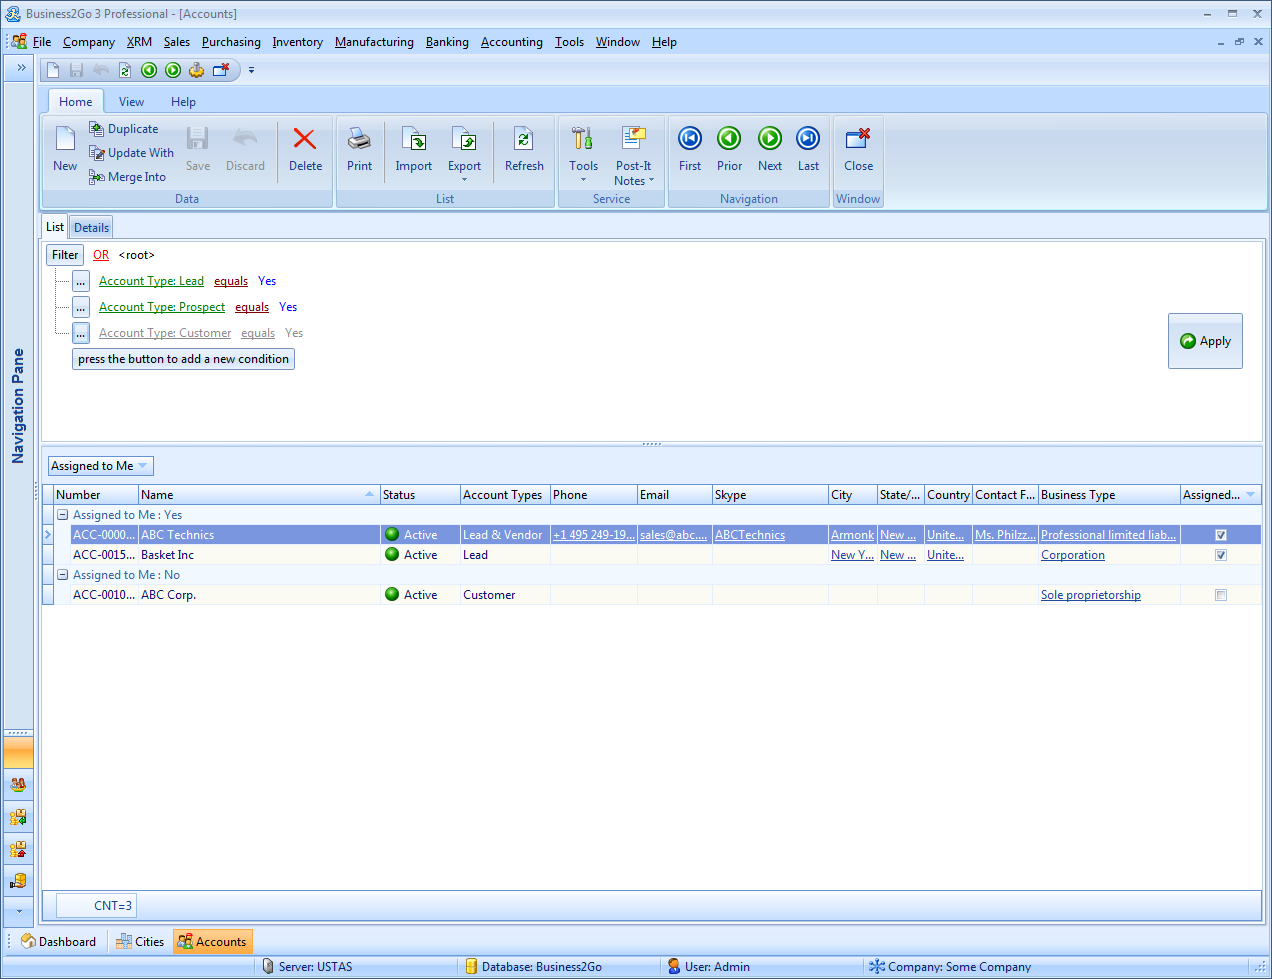
Now try to create a filter expression that will bring up all our Leads, Prospects and Customers. As companies we are searching must have either of the three account types: Lead/Prospect/Customer which means that we need to set the logical OR for the condition group.

Click press the button to add a new condition and add three conditions.

Click Apply to apply the filter.

Similarly, you can create selection of almost any complexity using complex conditions and even more. Advanced Filter allows geographical filtering to select data from a specific region on the map, for example, a state, city district, street, quarter etc. To apply this filtering type, you must geocode all the addresses first.

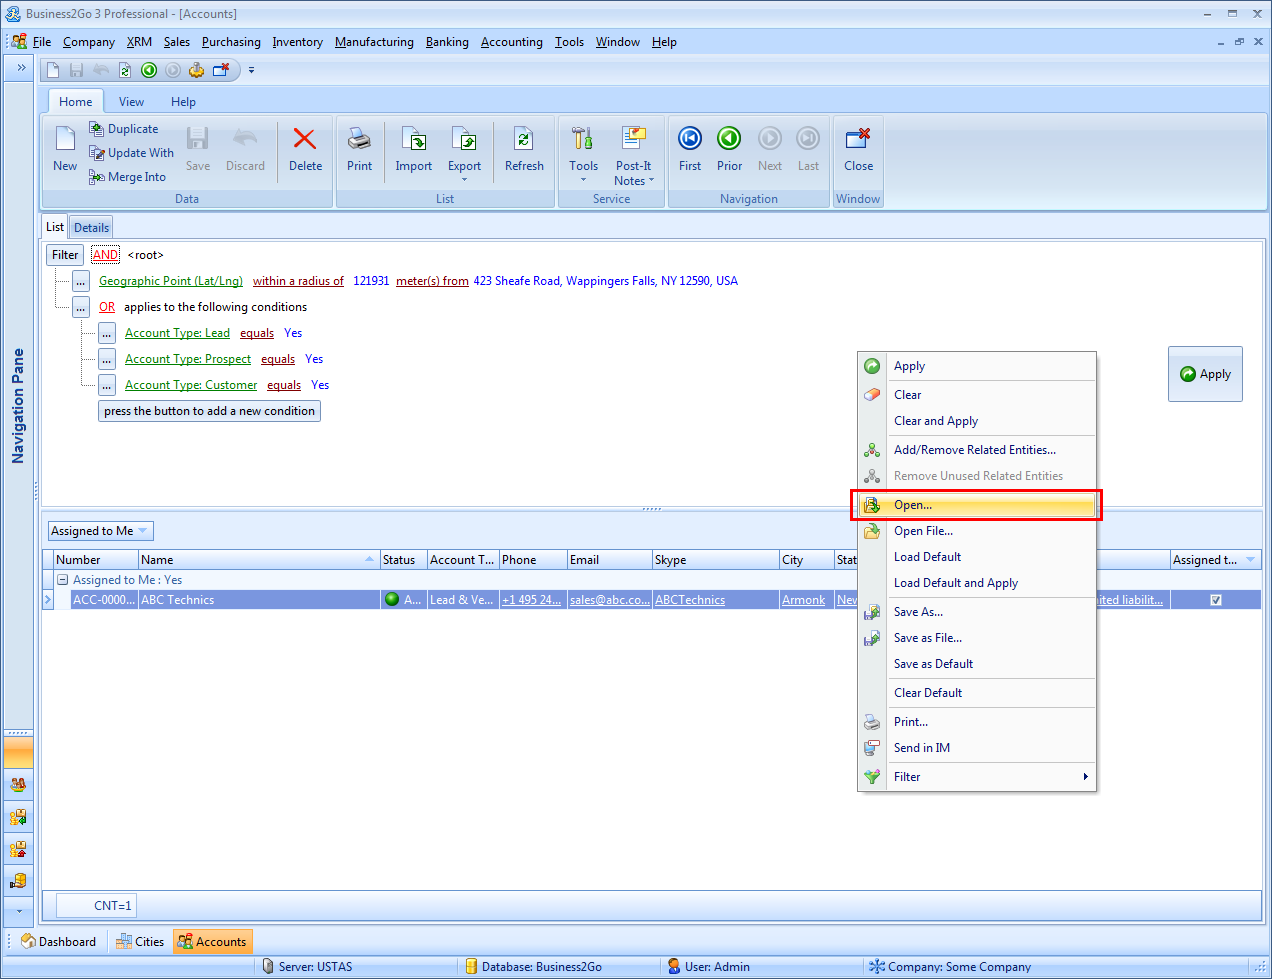
Now, let us make the conditions even more complex and try to find leads, prospects and customers in a specific part of the state of New York. To do so, we need to change the filtering condition by adding a new condition with the field Geographic Point (Lat/Lng) and select inside polygon as operator.
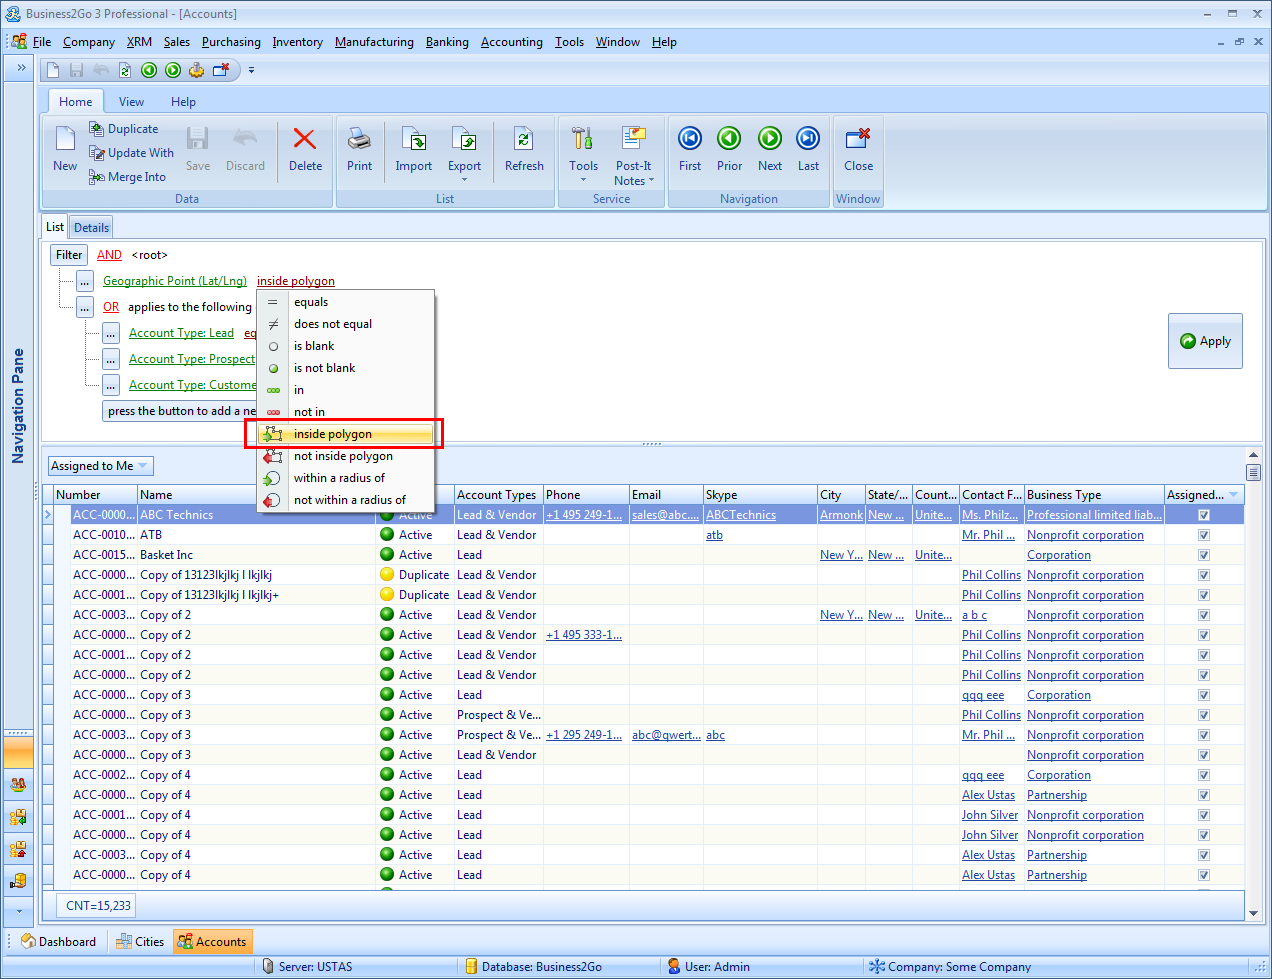
To select the region on the map, click the ellipsis button.

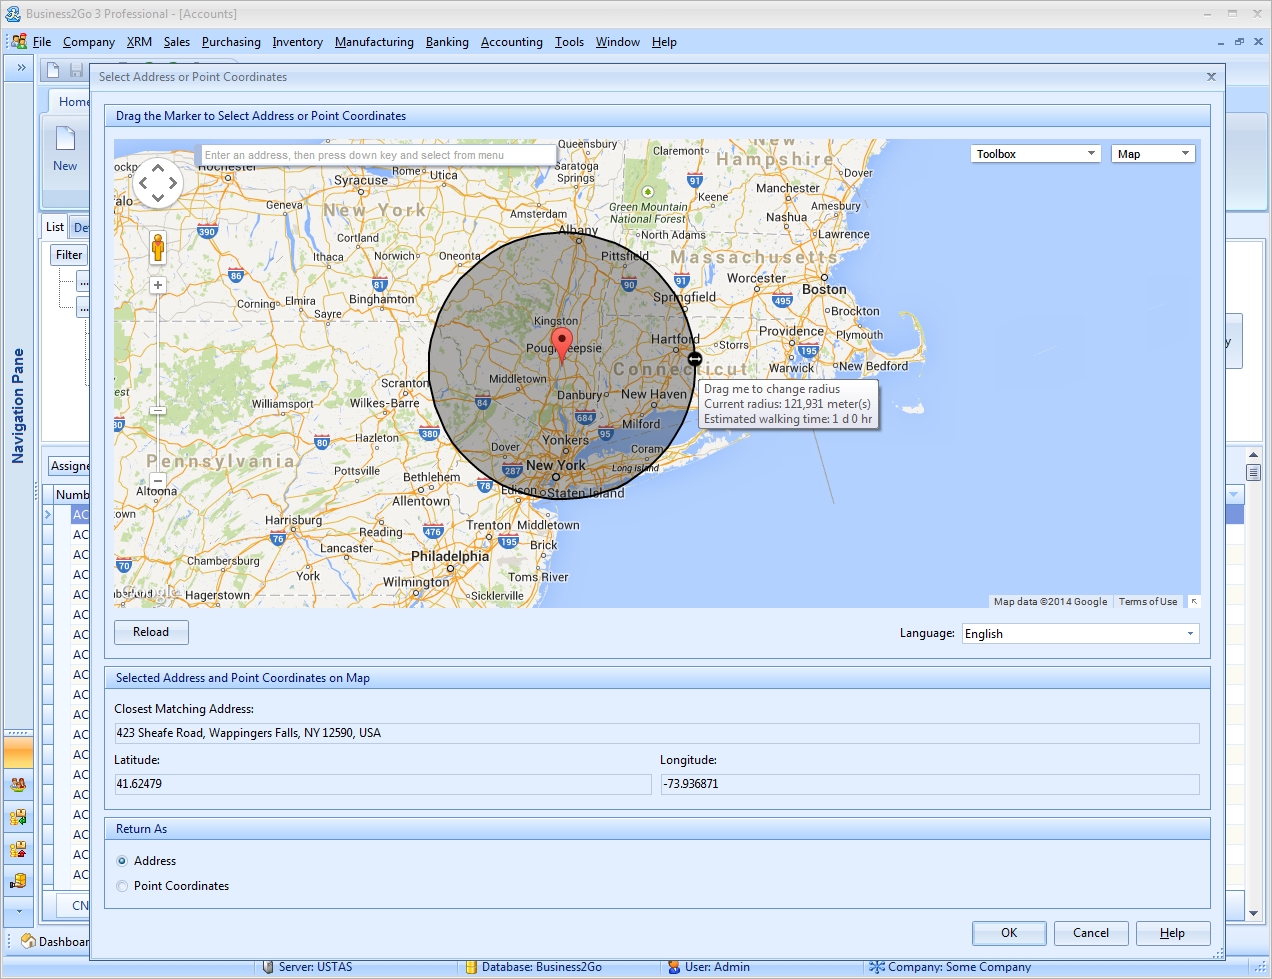
This brings up the map where we draw a polygon to search in.

In the selection dialog, click OK, and the polygon vertices from the Polygon Points (Lat/Lng) will be added as filter conditions.

Click Apply to apply the filter. The selection shows up.

With the geo-filtering operator within a radius of, you can search within a certain area around a specific point. The point can be set as address or coordinates of latitude and longitude.


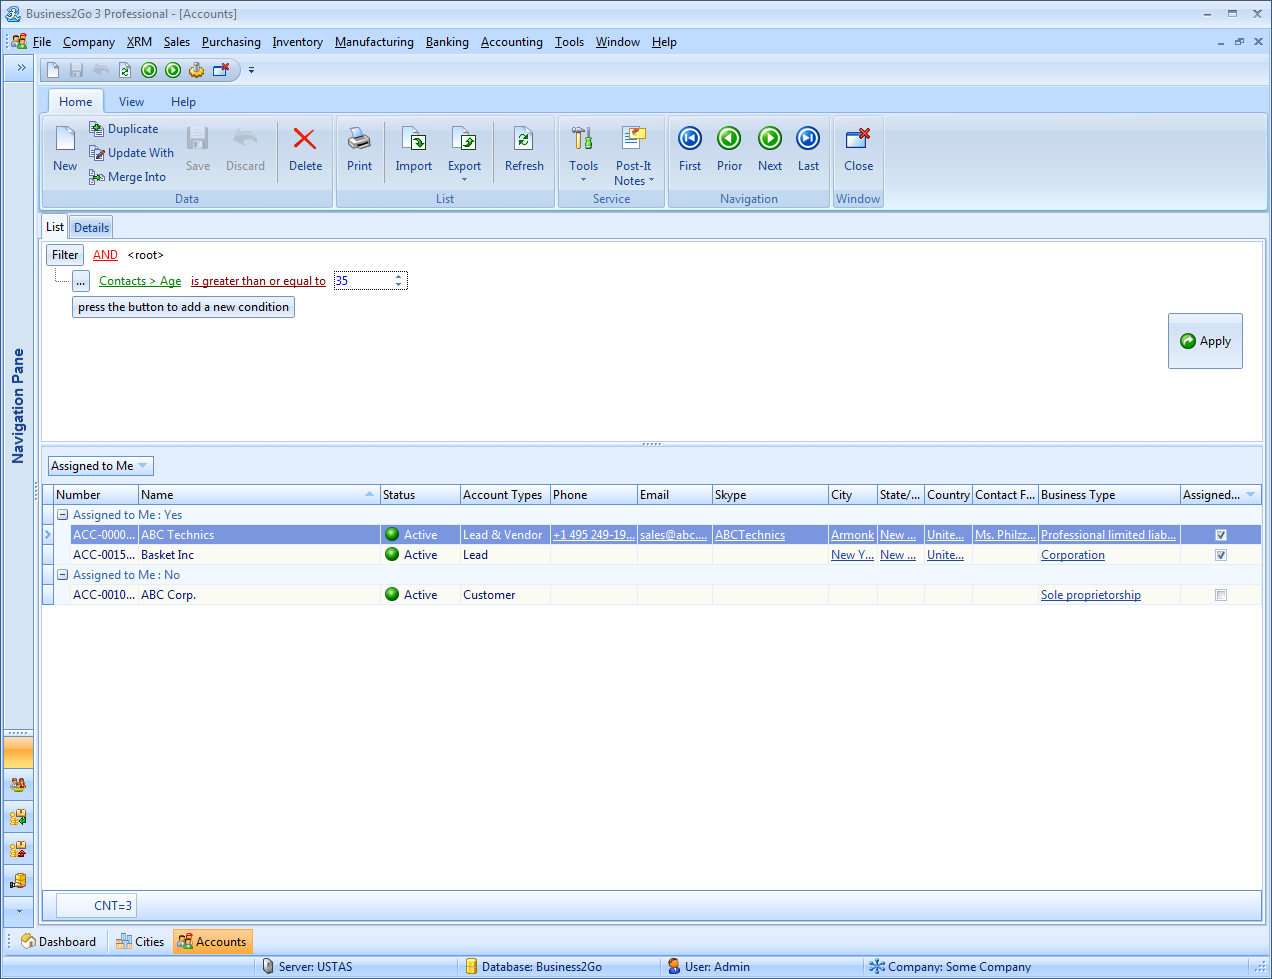
Another feature of Advanced Filter is the ability to refer to related data fields. It means that in the Accounts module filter you can refer to Invoices or any other module fields, if its data are related to Accounts. For example, we need to select companies that have at least one contact person older than 35. To access contact data we need to add these data...

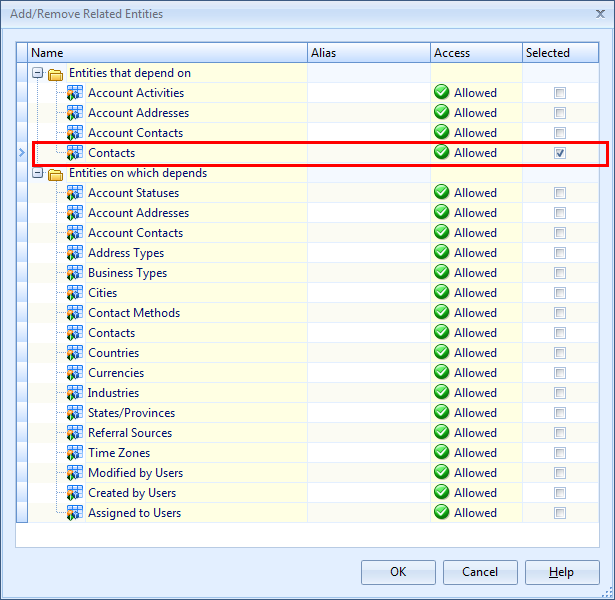

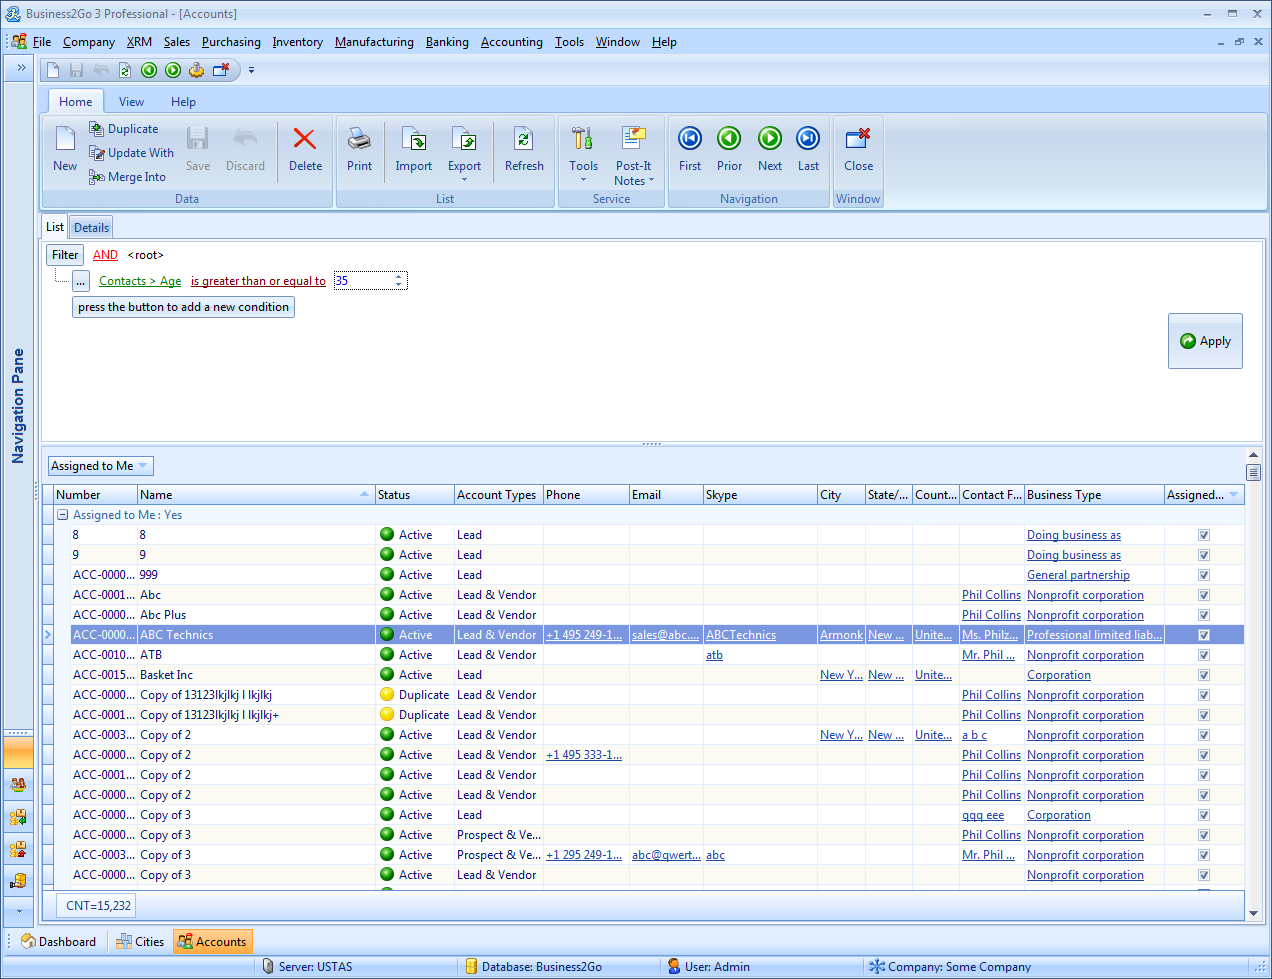
...and create a filter condition. Click Apply.
Other useful features of Advanced Filter include:
1) Ability to disable some filter conditions


2) Ability to save filter expressions to reuse and share with other users


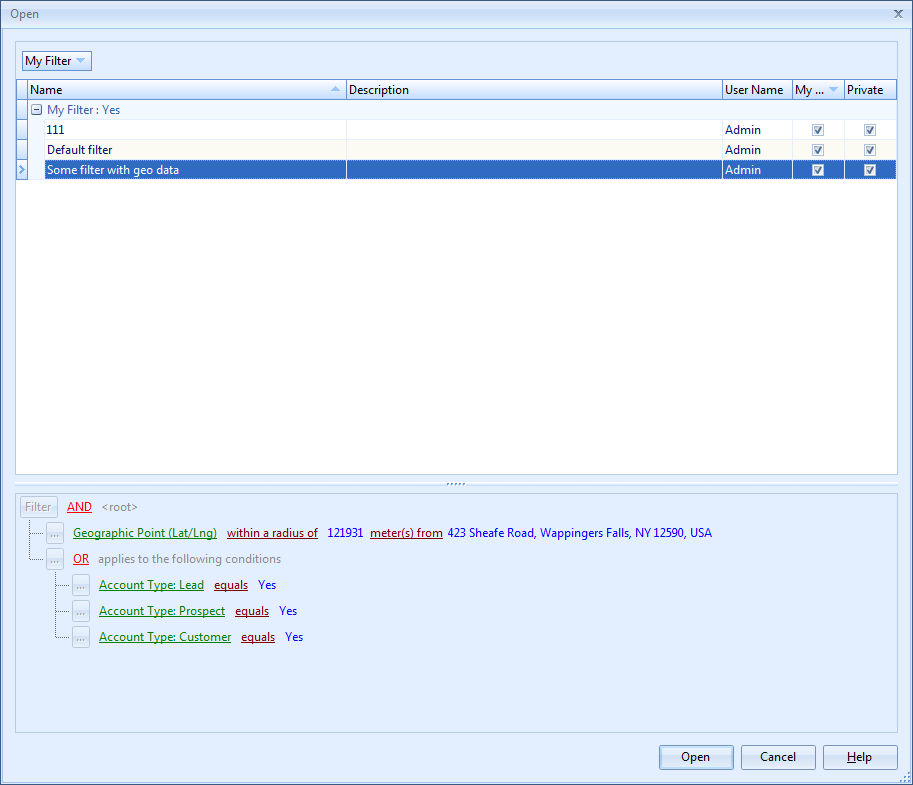
3) Additionally, if you use a specific filter expression frequently, you do not have to create it every time you open the module or the drop-down list. You can simply create the expression once and save it as a default filter that will be applied automatically, when you open the respective data list

With all the features mentioned above, Advanced Filter is an amazingly powerful tool to perform a wide variety of tasks, that can be used both for its direct purposes to filter data in modules and drop-down lists, and to generate ad-hoc queries - a reporting system of sorts.